Monitoring staff exposure to anesthetic gases is a critical component of any hospital or clinic’s safety program. In operating rooms, dental offices, veterinary clinics, and research labs, waste anesthetic gases (WAGs) can leak or linger in the air, potentially harming staff over time. Anesthetic gas monitoring badges offer a practical, cost-effective way to measure these exposures directly on personnel. In this article, we explore why monitoring is necessary, how these badges work, how to interpret their reports against safety thresholds, and how to implement a monitoring program in your facility. Throughout, we’ll reference OSHA and NIOSH guidelines and show how a proactive badging program can protect your team and keep you compliant – and we’ll explain how Compass Cryogenics can support you in this process.
Why Monitor Staff Exposure to Anesthetic Gases?
Protect Health and Safety: Trace anesthetic gas exposure over time can lead to serious health issues. Acute exposure may cause nausea, dizziness, headaches, or irritability, while prolonged chronic exposure has been linked to liver and kidney disease, neurological effects, and even reproductive risks like miscarriages, infertility, and birth defects. These findings have been documented for common anesthetic agents such as nitrous oxide and halogenated anesthetics (e.g., isoflurane, sevoflurane, desflurane). Even at low levels, waste anesthetic gases present in ORs or procedure rooms can accumulate and endanger staff if not properly controlled. Monitoring is the only way to know if trace gas levels are creeping above safe limits.
Ensure Compliance with Guidelines: Several agencies have issued guidelines to limit occupational exposure to anesthetic gases. The National Institute for Occupational Safety and Health (NIOSH) recommends that no worker be exposed to halogenated anesthetic agents above 2 parts per million (ppm) (measured as a ceiling over a sampling period ~1 hour) and that nitrous oxide (N₂O) be kept below 25 ppm as an 8-hour time-weighted average (TWA). Moreover, if halogenated agents are used in combination with N₂O (common in many anesthetic practices), NIOSH recommends limiting the halogenated gas to 0.5 ppm. It’s worth noting that OSHA has not set specific Permissible Exposure Limits (PELs) for most anesthetic gases. However, employers are still responsible under OSHA’s General Duty clause to maintain a safe workplace. In fact, some states have enacted their own limits (for example, Cal/OSHA’s PEL for isoflurane is 2 ppm over an 8-hour day). By using monitoring badges, EHS officers and compliance professionals can gather the data needed to ensure these guidelines are met and to document compliance for accreditation bodies like The Joint Commission.
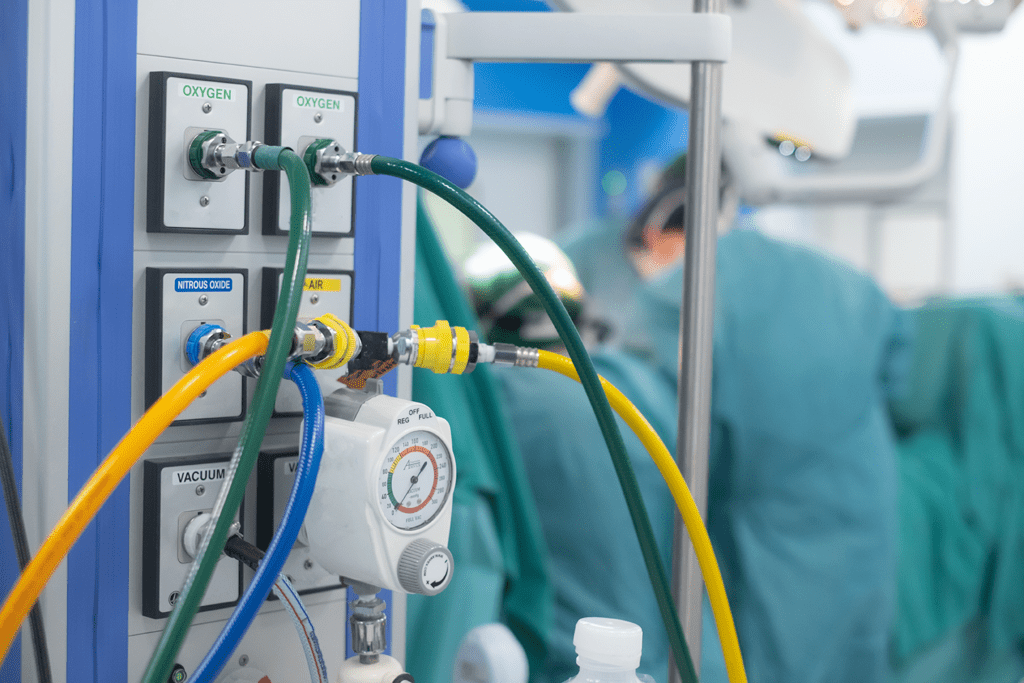
Identify Equipment Leaks or Inefficiencies: Waste anesthetic gases can escape into room air through many routes – leaking valves or gaskets in the anesthesia machine, disconnections in scavenging systems, or even human error such as leaving a vaporizer on or a mask loosely fitted on a patient. Personal exposure badges act as a “canary in the coal mine,” alerting you if these controls are failing. A spike in a badge reading might indicate a leak that otherwise went unnoticed. Early detection through regular monitoring allows you to fix issues with ventilation or equipment maintenance before they cause harm. In short, monitoring badges help verify that engineering controls (scavenger systems, room ventilation, etc.) are effectively keeping gas levels low.
Build a Culture of Safety and Trust: From an organizational perspective, implementing routine anesthetic gas monitoring demonstrates a commitment to staff wellbeing. This can improve worker morale and trust, as employees see that management is proactively checking their environment. It also provides peace of mind – both to staff and to administrators – that the facility is not inadvertently exposing people to invisible hazards. In settings like hospitals, surgery centers, dental clinics, and veterinary offices, where retaining skilled staff is important, a safe workplace is a key part of job satisfaction. By monitoring and transparently sharing results, you foster an environment of safety and open communication.
In summary, anesthetic gas monitoring badges help protect staff health, ensure compliance with safety guidelines, catch problems early, and demonstrate your facility’s commitment to a safe workplace. Next, we’ll look at how these badges actually work to measure personal gas exposure.
How Monitoring Badges Work (Chem Dosimetry Basics)
Passive Dosimetry: Anesthetic gas monitoring badges are a type of passive dosimeter – meaning they collect airborne chemicals without an active pump. Worn by the employee (often clipped to the collar in the breathing zone), each badge contains a small microporous membrane that covers an absorbent chemical medium. As the staff member goes about their work, air passes through the membrane and any anesthetic vapor molecules diffuse inward. The absorbent (such as an activated charcoal wafer or gel) traps these anesthetic gas molecules at a known rate. Because the uptake rate is calibrated, the badge effectively samples the air continuously while it’s worn, measuring the individual’s exposure dose.
Ease of Use: Gas monitoring badges are designed to be simple and unobtrusive. The employee typically needs no special training – they just clip the lightweight badge on at the start of the monitoring period and go about their normal tasks. The badges do not interfere with work and require no power source or noisy equipment. For example, an organic vapor badge for anesthetic gases contains no moving parts; it silently absorbs vapors while the staff works. At the end of the monitoring period, the badge is removed and sealed in a provided pouch, with the start/stop time noted on a label. This makes the process foolproof for busy OR or dental staff – wear it and forget it until it’s time to send it in.
Sampling Period: The duration a badge is worn can be flexibly matched to the scenario. Many anesthetic gas badges are validated for sampling periods ranging from about 30 minutes up to 8 hours. In practice, this means you can use them for a short-term snapshot (e.g. during a single surgical procedure or during a 1-hour dental sedation clinic) or for a full shift-long TWA measurement. A minimum of around 0.5 hours is typically recommended to collect enough sample. For most compliance checks, badges are worn for the duration of a typical work shift or the period of active anesthetic use. By capturing either a short-term exposure (which could be compared to a 15-min STEL guideline) or a full-shift exposure (8-hr TWA), the badges provide versatile data on both peak and average exposures.
Laboratory Analysis: After exposure, the badges are sent to a laboratory for analysis. In the lab, technicians use chemical analysis methods (such as OSHA or NIOSH analytical methods – e.g. a modified OSHA Method 103 for halogenated anesthetics) to extract and quantify the anesthetic gases collected on the badge. The result is typically reported in parts per million (ppm) or milligrams per cubic meter, representing the average concentration the person was exposed to during the wear time. Quality monitoring badge programs use accredited labs (e.g. labs with AIHA accreditation) to ensure accurate results. In fact, modern badge systems are very accurate – the best products meet or exceed OSHA and NIOSH accuracy requirements for industrial hygiene sampling at both 8-hour and 15-minute exposure levels. This means you can trust the badge readings to reliably reflect true exposure levels.
Target Chemicals: Anesthetic gas badges are generally designed to detect specific gases or groups of gases. For instance, one common badge type uses activated carbon to collect halogenated anesthetic vapors (such as isoflurane, sevoflurane, desflurane, halothane). These badges can often analyze multiple agents on one badge – for example, a single badge can report the levels of up to three different anesthetic vapors if needed. Nitrous oxide, being an inorganic gas, may require a different type of monitor (there are passive dosimeters for N₂O as well). By selecting the appropriate badge for the gases in use at your facility, you ensure the collected data is relevant. Compass Cryogenics supplies a range of certified monitoring badges – including badges for halogenated anesthetics (e.g., isoflurane) and other gases – to match your needs. Using these badges provides direct personal exposure measurements, which are more insightful than room air spot-checks alone, because they reflect what a staff member actually breathed.
Interpreting Badge Reports – Thresholds and Results
After the lab analyzes the badges, you will receive a report with the measured exposure levels. Understanding these results is key to improving safety. Here’s how to interpret the data:
- Compare Results to Recommended Limits: As discussed earlier, benchmark your badge results against known safety thresholds. For example, if an anesthesia nurse’s badge reading for isoflurane comes back as 0.5 ppm (8-hr TWA), this is well below the general NIOSH guideline of 2 ppm and certainly under the Cal/OSHA PEL of 2 ppm. In that scenario, the exposure is in a comfortable range. Conversely, if a reading came back at 2.5 ppm or 3 ppm, that exceeds the recommended 2 ppm ceiling – a red flag that needs attention. For nitrous oxide badges, compare against the 25 ppm NIOSH limit for the duration of anesthetic administration. Any result above 25 ppm (for N₂O) would indicate overexposure. Remember, OSHA has no federal PEL for N₂O, but the 25 ppm REL is a widely accepted guideline.
- Time-Weighted Average (TWA) vs. Short-Term Exposure: Ensure you know what time frame your badge result represents. Most badge reports will effectively give an average concentration over the wear period. If you wore the badge for 8 hours, the result is comparable to an 8-hr TWA. If it was worn only during a 1-hour procedure, the result may be treated as a peak or short-term sample. Compare short-term samples to any applicable short-term exposure limits. For example, if N₂O was used for only 30 minutes and the badge reads 40 ppm, that’s over the 25 ppm guideline (though for a shorter period – it suggests ventilation during that procedure was inadequate). When in doubt, consult an industrial hygienist or the badge provider to interpret whether a short sample should be time-weighted or directly compared to a ceiling limit.
- “ND” or Non-Detectable Results: Often, a well-controlled environment will yield badge results below the laboratory’s detection limit. A report might state ND (none detected) or “< LOD” (below level of detection) for certain agents. This is obviously good news – it means the exposure was extremely low. However, ND doesn’t always mean zero; it means it was lower than the lab could measure (which is usually on the order of a few tenths of a ppm for these analyses). Treat consistent ND results as confirmation your controls are effective, but continue periodic spot-checks (don’t become complacent because conditions can change).
- Exceedances and Action Levels: It’s wise to establish an internal “action level” below the actual limit. For instance, some safety programs take any reading above, say, 50% of the guideline as a trigger to investigate. If a badge comes back at 1.0 ppm isoflurane, you might choose to inspect equipment and ventilation even though 1.0 ppm is still under 2 ppm. This proactive approach can catch issues early. If a result does come in above the official limit (e.g. 2.5 ppm halogenated agent), treat it seriously: immediate interventions are warranted (more on that below and in the FAQs). Always document your comparisons and any follow-up actions. This documentation is important for compliance records and for communication with staff.
- Lab Uncertainty and Units: Badge reports will include the units (ppm or mg/m³) and may include some statistical uncertainty or confidence interval. A minor variation (for example, ±0.1 ppm) is normal due to lab measurement uncertainty. It’s generally not enough to affect the conclusion of safe vs unsafe. If a value is right at a threshold (e.g., exactly 2.0 ppm), consider it prudent to improve controls rather than debating the fine margin. When comparing mg/m³ to ppm, recall conversion factors (for N₂O, 25 ppm ≈ 46 mg/m³; for halogenated agents, it will differ by compound – but most reports will stick to ppm which is easier to use).
Compass Cryogenics provides full-service support in interpreting badge results. When you use our anesthetic gas monitoring badges, our team will help explain the report, compare it to relevant OSHA/NIOSH guidelines, and recommend next steps. If a result is elevated, we can assist in pinpointing the cause (be it a leak, ventilation issue, or procedural drift) and advise on corrective measures. Our goal is not only to test, but to ensure your facility stays safe and compliant.
Implementing a Monitoring Program at Your Facility
Having the knowledge and tools is only half the battle – you also need a plan to regularly use the badges and respond to the findings. Here’s how to implement an effective anesthetic gas monitoring program:
- Assess Your Needs: Identify where and when anesthetic gases are used in your facility. Common areas include operating rooms (general anesthesia with gases), dental operatories (nitrous oxide sedation), veterinary surgery suites, endoscopy or procedure rooms (if sedation gases are used), and post-anesthesia recovery units (patients exhaling residual anesthetic). Determine which staff have the highest potential exposure – e.g. anesthesiologists, nurse anesthetists, OR nurses, dental assistants, veterinarians and vet techs. These will be your primary candidates for wearing badges. Also review any past incidents or complaints (such as staff noticing anesthetic odors or symptoms), which might indicate a need for immediate monitoring.
- Obtain Quality Badges and Lab Services: Choose a reliable monitoring badge provider. You’ll want badges that are validated for the anesthetic agents in question and a lab service capable of accurate analysis (preferably AIHA-accredited). Compass Cryogenics can serve as your one-stop solution here – we supply certified anesthetic gas monitoring badges and coordinate fast, accurate laboratory analysis with results typically available within days. Budget for the number of badges you’ll need. Generally, each individual monitored will use one badge per sampling session, and you may want a few extra for area sampling or re-tests. Ordering badges in advance (they often have a 6–12 month shelf life) ensures you have them on hand when needed.
- Establish a Sampling Schedule: Decide when to conduct monitoring. A good practice is to start with an initial baseline survey: have key personnel wear badges during representative procedures or shifts. For example, you might badge every anesthetist or a sample of OR staff over several surgeries to capture typical exposure levels. If all baseline results are well below thresholds, you can move to periodic monitoring. Many facilities opt for annual or semi-annual monitoring for anesthetic gases as part of their routine EHS audits. High-use environments (e.g. busy surgery centers or veterinary hospitals) might do it more frequently, such as quarterly, especially at first. Always conduct additional monitoring after any major change – for instance, if you get new anesthesia machines or alter the ventilation system, or if you introduce a new anesthetic agent. And of course, if any badge comes back high, perform follow-up monitoring after corrective actions to verify the issue is resolved.
- Training and Deployment: While badges are simple to use, do brief your staff on how and why you are monitoring. Explain that the badge is worn for their protection and how to properly wear it (in the breathing zone, for the full assigned period). Emphasize not to remove it during the procedure/shift (except if it becomes contaminated or gets in the way of sterile field, etc., in which case have a plan to replace it). Also instruct them how to record the start/end times if needed, and where to turn in the badge afterward. This small step of staff engagement ensures better compliance and data quality. It can be helpful to designate a coordinator (perhaps the EHS officer or OR manager) to distribute and collect badges and ensure they are sent to the lab promptly.
- Documentation and Record-Keeping: Treat badge results as important safety records. When reports come back from the lab, maintain a log of the results, the date, who was monitored, and the operating conditions (which anesthetic was used, was scavenging functioning, etc.). This context helps interpret the numbers. If all is well, these records demonstrate due diligence and compliance if an inspector or accreditation surveyor asks. If results show an issue, document your corrective actions (e.g., “On 6/10, badge for OR#2 nurse showed 3 ppm sevoflurane – exceeded limit. Investigated and found a circuit leak. Gasket replaced on 6/12. Follow-up badge on 6/15 showed <0.2 ppm, issue resolved.”). This kind of documentation not only keeps you organized but also provides evidence that your monitoring program is effective and responsive.
- Continuous Improvement: Monitoring is not a one-and-done task. Use the data to improve your processes. For instance, if one OR consistently has higher readings, maybe it needs better ventilation checks. If veterinary staff readings are edging up, perhaps retrain on proper use of scavenger canisters or check the room for drafts. Engage your staff in solutions – they might have practical insights (like a certain anesthesia mask doesn’t seal well on some patients, causing more leakage). By iterating on findings, you create a feedback loop that continually enhances safety. Regularly review the monitoring program – at least annually – to decide if you need to adjust frequency, add new personnel to monitoring, or update equipment. And stay informed: if guidelines change or if new technology like real-time anesthetic gas alarms become available, consider integrating those as well, with badges remaining a valuable periodic compliance check.
Throughout implementation, Compass Cryogenics is available to assist. We don’t just sell you badges – we partner in your safety journey. Our experts can help you design a monitoring plan tailored to your facility size and case volume. We’ll ensure you have the right badges for the right agents, and we offer consultation on interpreting results and advising interventions if problems are detected. By working with a specialized provider like us, you gain peace of mind that your anesthetic gas monitoring program will run smoothly and yield actionable insights. Don’t hesitate to reach out to Compass Cryogenics for a free consultation on setting up your monitoring program or to inquire about our badge supply and analysis services – we’re here to help keep your staff safe and your facility compliant.
Frequently Asked Questions (FAQs)
It depends on what you’re trying to measure, but generally the badge is worn throughout the period of potential exposure. For most, this means an entire work shift or the full duration of one or more anesthesia procedures. Monitoring badges for anesthetic vapors are typically designed for sampling times between about 30 minutes up to 8 hours. For instance, in a dental office using nitrous oxide on and off, a badge might be worn all day to capture the cumulative exposure. In a busy OR, staff might wear a badge for the length of a surgical shift (e.g. 8 hours). If you only want to measure a specific procedure, you could have the badge on just for that case (provided it’s at least the minimum sampling time – often ~30 minutes). In summary, wear the badge for the entire period you want to assess. Most facilities include setup and cleanup time as well, since anesthetic gas can leak before induction and after emergence. Always follow the badge manufacturer’s instructions for minimum and maximum sampling times. After use, promptly seal and send the badge for analysis to ensure the most accurate reading.
Anyone who works regularly with or near anesthetic gases should be considered for monitoring. In practice, this includes:
- Operating Room staff: Anesthesiologists, nurse anesthetists (CRNAs), anesthesiology assistants, OR nurses, and surgical techs are all potentially exposed to waste gases during surgery. Even surgeons can be exposed, though they often stand a bit further from the anesthesia equipment.
- Dental clinic staff: Dentists, dental assistants, or hygienists administering or working around nitrous oxide sedation should wear badges during those procedures. Nitrous oxide can accumulate in dental operatories if scavenging is suboptimal, so dental staff are a key group to monitor.
- Veterinary clinic staff: Veterinarians and vet techs/nurses involved in animal surgeries and dental cleanings under anesthesia should be monitored. Studies have found that without proper scavenging, vet workers can have high isoflurane exposure, so badging is important in keeping clinics safe.
- Laboratory/research personnel: Anyone using anesthetic agents (like isoflurane in research animal facilities) should wear badges, especially if procedures aren’t in a fume hood. In research settings, it’s common to badge researchers initially for a number of sessions to ensure procedures are safe.
- Recovery room staff (PACU): In some cases, post-anesthesia care unit nurses are monitored if patients breathe out anesthetic vapors (mainly if nitrous or halogenated agents were used and room ventilation is a concern).
In short, focus on the roles with highest exposure frequency and proximity to the gas source. If you’re starting a program, you might badge a representative from each category (e.g., one anesthetist, one circulating nurse, one surgeon) to see where the highest exposures are, then adjust who to monitor regularly. Importantly, if any staff member is pregnant or has heightened sensitivity, you may choose to monitor them individually as an extra precaution. Remember that monitoring one person’s badge only reflects that individual’s experience – so if different team members have different tasks (e.g., the anesthesiologist versus the circulating nurse), you may need to badge both at some point to get a full picture.
When using reputable badges and accredited lab analysis, the results are very accurate for monitoring purposes. Passive dosimeter badges have been rigorously tested and are required to meet OSHA and NIOSH accuracy standards (typically within ±25% for concentrations of concern). Manufacturers design these badges to collect a controlled sample of air; the absorbent and diffusion rates are calibrated so that the lab can back-calculate the concentration with confidence. Many badge systems include a blank/unexposed control and undergo lot validations to ensure accuracy. Furthermore, analysis is usually done by gas chromatography or similarly precise methods in specialized laboratories. For example, badges from leading providers are processed in AIHA-accredited labs with results often available within 48 hours, and the analysis is included with the badge purchase. In summary, you can trust a quality badge’s readings as much as you’d trust a direct-reading instrument – for the purpose of assessing compliance with exposure limits. That said, no measurement is 100% perfect: there’s a small margin of error, and extremely short sampling times or improper use (e.g., covering the badge or saturating it with very high concentrations) can affect accuracy. But under normal conditions and following instructions, monitoring badges are a reliable indicator of personal exposure. If you ever have doubts (say a reading seems unexpectedly high or low), consult with the provider; they might review lab calibration or suggest a re-sample to verify.
A result above recommended exposure limits should trigger immediate investigation and corrective action. First, ensure the person is removed from further exposure until the issue is addressed – staff safety comes first. Then, begin troubleshooting: identify the source of the excess exposure. Common causes include an equipment leak (e.g., a crack in a breathing circuit, faulty anesthetic scavenging system, worn gasket on the ventilator) or procedural issues (mask not properly sealed on the patient, gas left flowing too long, inadequate room ventilation). For example, if an OR nurse’s badge came back at 3 ppm isoflurane (when it should be <2 ppm), one might discover that an exhaust hose was disconnected or the gas scavenger was overwhelmed during that case. Once you find the likely cause, fix it immediately – repair or replace faulty equipment, retrain staff on proper technique, increase ventilation, etc. It’s wise to involve your facility’s safety officer or industrial hygienist at this stage. In fact, many organizations have a policy that if a badge shows an overexposure, the incident must be reviewed with an EHS/IH professional before that procedure type continues. They may observe a case to verify correct procedures and make recommendations (this could include checking room ventilation rates or changing how gas is administered). After fixes are in place, repeat the monitoring to confirm that exposures have fallen back down to safe levels. All this should be documented. Additionally, consider medical surveillance for the affected worker: if someone had a significant overexposure, an occupational health physician might evaluate them, especially if they have symptoms. In summary, an exceeded limit is treated as a serious red flag – stop, find the cause, fix the issue, and re-test. By acting quickly, you not only protect staff from ongoing harm but also demonstrate compliance responsibility. (And yes, Compass Cryogenics can assist in these situations – from leak testing your systems on-site to providing rapid-turnaround badges for re-checks.)
The frequency of monitoring can vary based on your facility’s needs and past results, but here are some general guidelines: Perform an initial series of monitoring when you first implement the program or when starting to use anesthetic gases. This might mean badging a few staff for several procedures to establish baseline exposure levels. If those initial results are all low (well under the limits), you can shift to a maintenance schedule. Many healthcare facilities will do routine monitoring annually as part of their safety audits. Others choose semi-annual (twice a year) if they use anesthetic gases frequently or just want extra assurance. For example, a veterinary clinic might badge staff every six months, whereas a hospital OR might do a yearly campaign of badges unless a change occurs. Always monitor after any significant change: new equipment, renovations to the HVAC system, switching to a different anesthetic agent, or increase in case load – all should prompt a fresh round of badges to ensure exposure stays in check. Importantly, if any staff report symptoms or smell anesthetic odors, don’t wait – conduct targeted monitoring promptly in that area. Think of badges as both a regular check-up and a diagnostic tool when something seems off. Also, consider rotating who wears badges if not everyone can be tested at once; over time you want to ensure all roles/environments are assessed (for instance, one quarter you badge anesthetists, next quarter nurses, etc., if resources are limited). In summary, at least once a year is a good baseline for steady operations, with more frequent (e.g. semi-annual or quarterly) monitoring if your risk assessment deems it necessary or if any changes or concerns arise. Remember, the goal is continuous assurance – regular monitoring helps catch problems early and maintain a safe workplace.
By diligently using anesthetic gas monitoring badges and following up on the data, you can create a safer environment for all staff while staying compliant with occupational health standards. If you need assistance setting up a monitoring program or interpreting the results, reach out to Compass Cryogenics. Our expertise in medical gas safety and our full range of monitoring badge services will help ensure that trace anesthetic gases never become a big problem for your facility. Your staff’s health and peace of mind are worth it – and monitoring badges are a proven tool to achieve that safety goal.